Here's the Stock Firmware of HUAWEI GR5 2017 Firmware (BLL-L22, Android6.0, EMUI4.1, C636B150, Southern-East Asia Channel).You can download this firmware via the direct mirror provided on this page.
Download Link:HUAWEI GR5 2017 Firmware (BLL-L22, Android6.0, EMUI4.1, C636B150, Southern-East Asia Channel) File Size 1.87GB
Normal upgrade needs to start the handset and enter the Setting module. Force
upgrade is often used when the handset can’t boot up or can’t enter the idle screen.
made by Sandisk, Kingstone, or Kingmax is recommended.
Step 2. Format the MICRO SD card (This operation is optional).
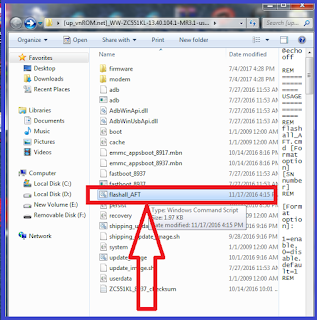
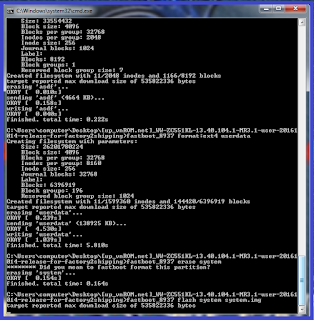
Step 3. Copy the Software: main package to a directory named dload.
\
Step 4. Copy the entire dload folder (with UPDATE.APP in it) to the root directory of the
MICRO SD card.
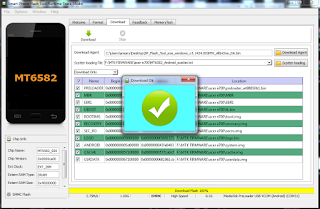
Step 5. Insert the MICRO SD card into the handset and power on. After entering the
home screen, find System Update application, press System Update->Updet via SD
card to start the upgrade. Reference to the following pictures
![]()
![]()
Step 6. When the progress bar stop, the phone will restart, if not you need to remove the
battery manually.
![]()
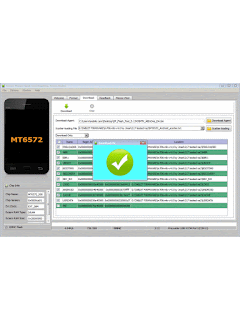
Step 7. Copy the Software:vendor package to a directory named dload. Then
Execute Step 4 – Step6 repeatedly.
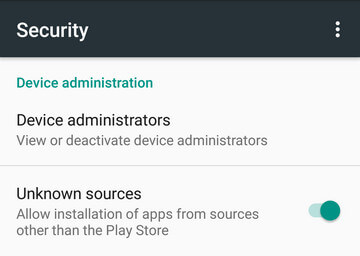
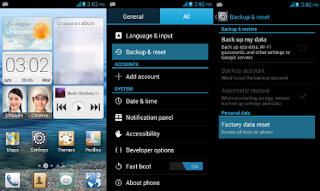
Step 8. After the vendor is flashed, we need to do factory reset manually. For doing
factory reset manually go to Settings ->Backup & reset -> Factory data reset -> Reset
Phone -> Erase everything. Please refer following screen shots for the same.
![]()
![]() Step 9. Once the factory reset is done, device will restart , if not you need to remove the
Step 9. Once the factory reset is done, device will restart , if not you need to remove the
battery and restart manually.
made by Sandisk, Kingstone, or Kingmax is recommended.
Step 2. Format the MICRO SD card (This operation is optional).
Step 3. Copy the Software: main package to a directory named dload.
Step 4. Copy the entire dload folder (with UPDATE.APP in it) to the root directory of
the MICRO SD card.
Step 5. Make sure your handset is power off. Insert the MICRO SD card into the
handset. Press the VOLUME UP and VOLUME DOWN key, and then press the
POWER key to power on the phone and enter the Software Upgrade Mode.
Step 6. When the progress bar stop, the phone will restart, if not , you need to
remove the battery manually.
![]() Step 7. Copy the Software:vendor package to a directory named dload. Then
Step 7. Copy the Software:vendor package to a directory named dload. Then
Execute Step 4 – Step6 repeatedly.
Step 8. After the vendor is flashed, we need to do factory reset manually. For doing
factory reset manually go to Settings ->Backup & reset -> Factory data reset ->
Reset Phone -> Erase everything. Please refer following screen shots for the
same.
![]()
![]() Step 9. Once the factory reset is done, device will restart , if not you need to remove
Step 9. Once the factory reset is done, device will restart , if not you need to remove
the battery and restart manually.
Download Link:HUAWEI GR5 2017 Firmware (BLL-L22, Android6.0, EMUI4.1, C636B150, Southern-East Asia Channel) File Size 1.87GB
Upgrade introduction
There are two methods to upgrade: normal upgrade and force upgrade.Normal upgrade needs to start the handset and enter the Setting module. Force
upgrade is often used when the handset can’t boot up or can’t enter the idle screen.
Upgrade operations
Normal upgrade
Step 1. A MICRO SD card of 2GB or more should be available. The MICRO SD cardmade by Sandisk, Kingstone, or Kingmax is recommended.
Step 2. Format the MICRO SD card (This operation is optional).
Step 3. Copy the Software: main package to a directory named dload.
\
Step 4. Copy the entire dload folder (with UPDATE.APP in it) to the root directory of the
MICRO SD card.
Step 5. Insert the MICRO SD card into the handset and power on. After entering the
home screen, find System Update application, press System Update->Updet via SD
card to start the upgrade. Reference to the following pictures


Step 6. When the progress bar stop, the phone will restart, if not you need to remove the
battery manually.

Step 7. Copy the Software:vendor package to a directory named dload. Then
Execute Step 4 – Step6 repeatedly.
Step 8. After the vendor is flashed, we need to do factory reset manually. For doing
factory reset manually go to Settings ->Backup & reset -> Factory data reset -> Reset
Phone -> Erase everything. Please refer following screen shots for the same.

battery and restart manually.
Force upgrade
Step 1. A MICRO SD card of 2G or more should be available. The MICRO SD cardmade by Sandisk, Kingstone, or Kingmax is recommended.
Step 2. Format the MICRO SD card (This operation is optional).
Step 3. Copy the Software: main package to a directory named dload.
Step 4. Copy the entire dload folder (with UPDATE.APP in it) to the root directory of
the MICRO SD card.
Step 5. Make sure your handset is power off. Insert the MICRO SD card into the
handset. Press the VOLUME UP and VOLUME DOWN key, and then press the
POWER key to power on the phone and enter the Software Upgrade Mode.
Step 6. When the progress bar stop, the phone will restart, if not , you need to
remove the battery manually.

Execute Step 4 – Step6 repeatedly.
Step 8. After the vendor is flashed, we need to do factory reset manually. For doing
factory reset manually go to Settings ->Backup & reset -> Factory data reset ->
Reset Phone -> Erase everything. Please refer following screen shots for the
same.


the battery and restart manually.